How to Cook Beef Tenderloin Filets on Grill
Whether you have the Original Ninja Foodi Grill or the XL Grill, this article will show you how to cook the PERFECT steak for YOU!

There isn't a right way or wrong way to cook a steak. The only thing that matters is that YOU like it. We all have different opinions on how steak should be cooked and, while I'm in the rare to medium-rare camp, it is perfectly fine if you like your steaks cooked well done. No judgement here at all. Food is meant to be enjoyed, so cook it how you like it!
This post may contain affiliate links. If you make a purchase after clicking a link, I may earn a small commission. As an Amazon Associate, I earn from qualifying purchases.
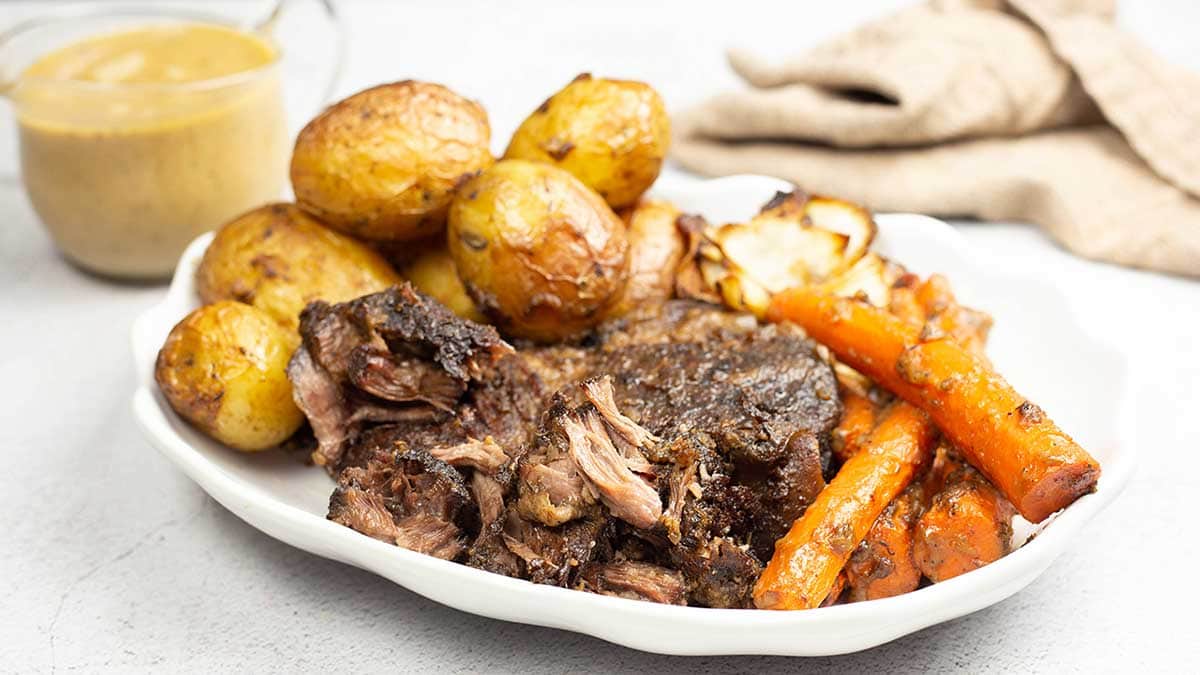
This article will apply to many cuts of beef that are usually made into steaks. Cuts of beef, such as chuck roast, are best cooked at lower temperatures for longer periods of time so the connective tissues have time to break down.
Please see this recipe for Pot Roast in the Ninja Foodi Indoor Grill or this recipe for Pot Roast in a pressure cooker for those cuts of meat.
Best Cut of Steaks for Grilling
This list is pretty extensive, but here are the cuts of steak that are my go-to for grilling.
- Filet Mignon
- Ribeye
- New York Strip or other strip steaks
- Porterhouse (Filet with New York Strip)
- Flank Steak
- Top Sirloin
- Flat Iron Steak
- Skirt Steaks
Do All Cuts of Beef Cook the Same?
Yes, they do all cook the same way (transfer of heat), but that doesn't mean that you cook them the same. There are cuts of beef, like a chuck roast, that do better when cooked at lower temperatures for longer periods of time.
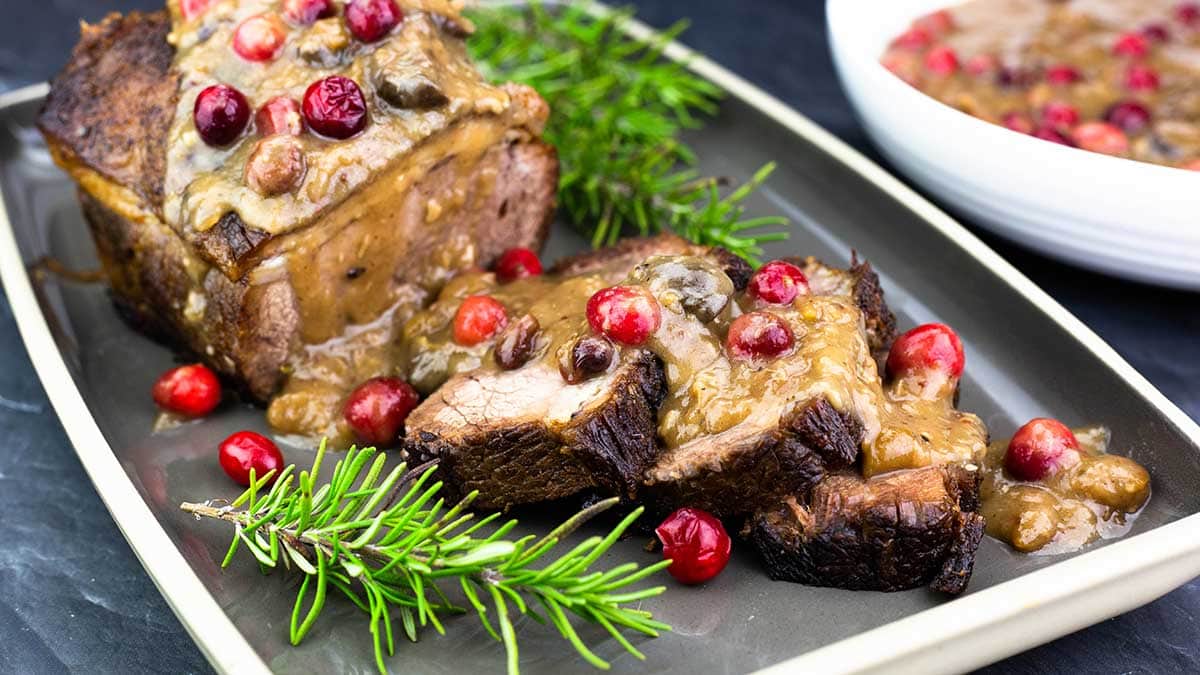
There are cuts of beef that work great for grilling and some that are better pressure cooked or even smoked. Brisket is a great example of a cut of beef that really needs a long cooking time. My favorite way to cook it is in a smoker, low and slow. However, a combination of pressure cooking and air crisping also works great! I did a cranberry brisket this way and it turned out amazing!
Cooking anything is all about heat transfer. You apply heat for a certain period of time and your food cooks. It's fairly straightforward and simple, or is it?
It is, as long as you keep in mind some differences in the various cuts of beef that you are cooking and adjust your temperatures as needed.
Some cuts of beef, like a filet, do great with high grilling temperatures. Others, such as a ribeye, do better with a slightly lower grilling temperature. Why? It's all about the fat.
If you have a fattier cut of beef, like a ribeye, and have your grill temperature too high, you will get a lot of smoking from the fat AND your steak will cook before the fat has a chance to render and get crispy.
This is especially important when grilling on an indoor grill! If you throw that ribeye on the Ninja Foodi Indoor Grill on the MAX GRILL setting, be prepared for the smoke detector to go off.
It is much better to grill a fattier cut of beef on the Medium or High grill setting.
I will also note that if you like your steak well done, you might want to decrease your grill setting to high instead of max grill even if it is a lean cut so the outside doesn't get too tough before your steak is cooked to your desired temperature.
There are also certain cuts of beef that are best marinated before grilling. One example is what is labeled "London Broil" in most grocery stores. London Broil isn't actually a cut of beef, it's a preparation. The cut used most often is a top sirloin or a flank steak. With the popularity of the flank steak in recent years, I'm finding that a top sirloin is more common.
These thin and long pieces of beef do really well marinated and then grilled to a medium rare. If you cook them to medium-well or well, they do tend to be a little tough and chewy.
Here is a recipe for a Marinated London Broil done on the Ninja Foodi Indoor Grill.
Factors that Affect the Cooking Time of Steak
There are several factors that go into determining the cook time on a steak. The two most important factors are the thickness of the steak and how you like it cooked.
The other factor is what is the temperature of the steak before you grill it. I always suggest bringing your steak out at least 30 minutes before cooking so it can start to warm up. Make sure to follow food safety guidelines and don't leave the steak out for longer than 2 hours before cooking.
If you start out with a cold steak, you will need to increase your timing by a few minutes. A steak that is left out for at least 30 minutes will also sear better. This is because it doesn't cool down the grill as much as a cold steak will, so we have more immediate heat transfer.
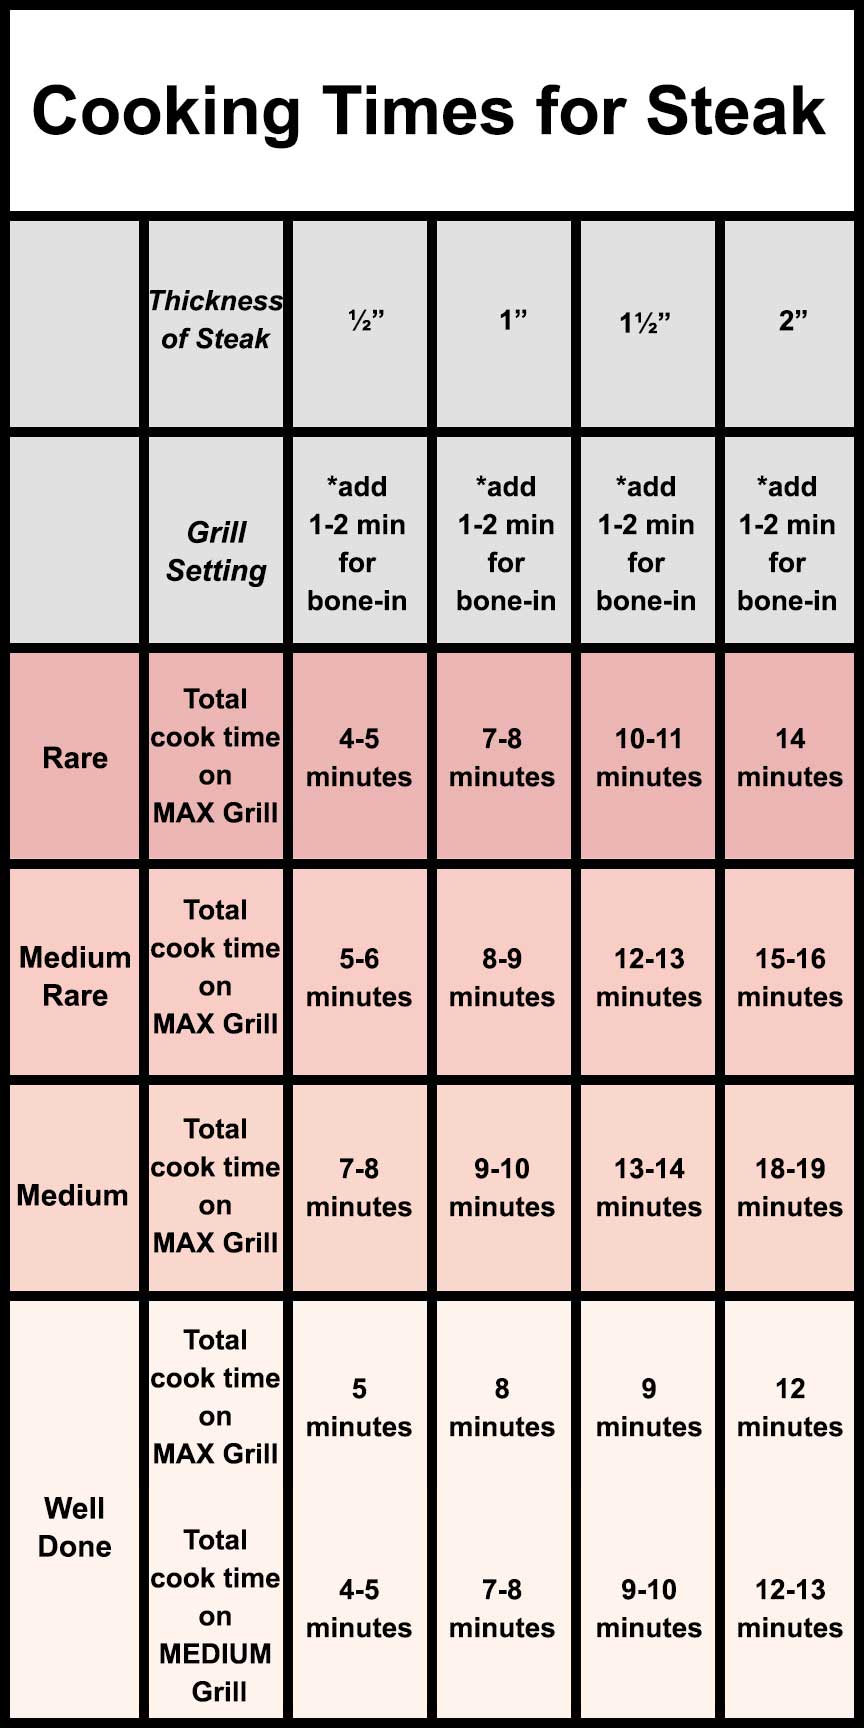
Please see the chart below for cooking times based on thickness of the steak.
Also keep in mind that there isn't a chart that is 100% accurate in all instances and they should be used as a guideline only. The only way to measure the temperature of a steak is with a good thermometer.
I like to use both the probe that comes with my Ninja Foodi XL Grill AND my instant read thermometer. Sometimes, the probe is more of a hassle than it's worth, but I have found it to be accurate when it is placed correctly. I'll go over proper probe placement in a bit.
How to Cook the Perfect Steak in the Ninja Foodi Indoor Grill
In order to cook your steak perfectly in the indoor grill, you first need to determine how you want your steak cooked. Like I said earlier, there are no judgements on how you like your steak and anyone who tells you otherwise is a food snob.
All food is meant to be cooked and enjoyed by YOU and your family, so cook it how you like it.
That being said, there are some cuts of steak that do much better with well done temperatures than others. For example, a filet mignon and a ribeye tend to stay tender even when cooked well done.
Other cuts, not so much. Especially thin cuts, like flank steak, really get tough when cooked well done. So, just keep that in mind when choosing the best cut for you.
Tips for Cooking the PERFECT Steak in the Ninja Foodi Indoor Grill
- Preheat the grill on Max grill for at least 10 minutes with the grill grate in the grill.
- Let your steak sit out at room temperature for at least 30 minutes before cooking.
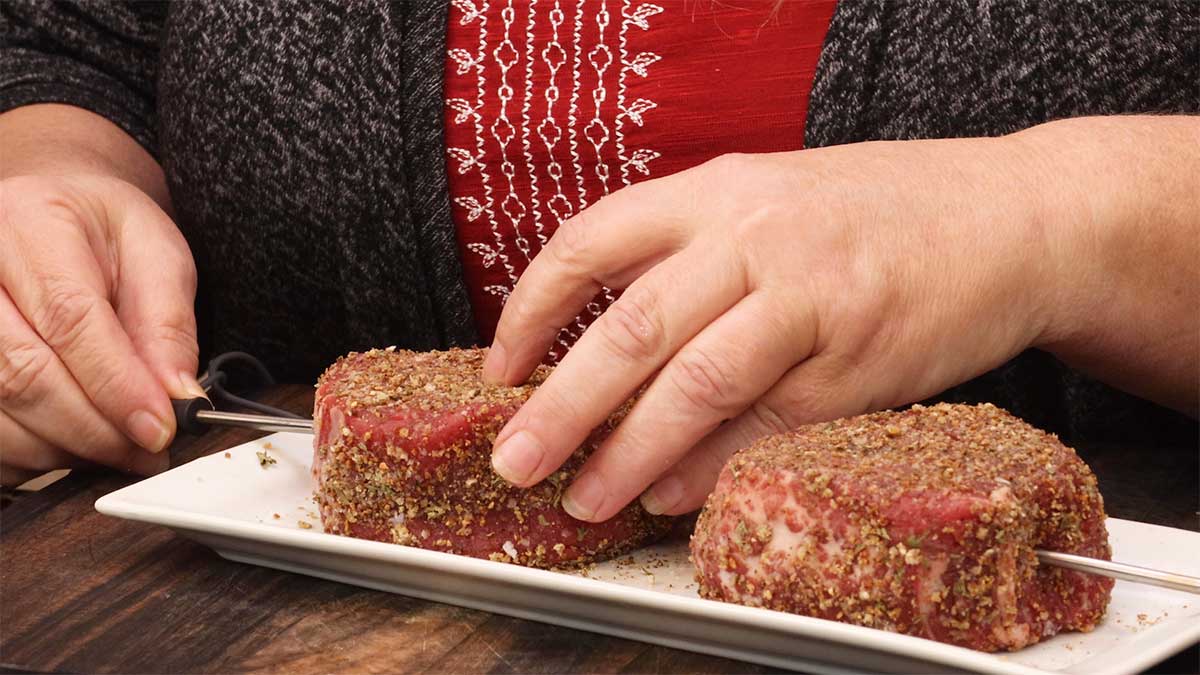
- Season and wrap your steak in cling wrap and put in the refrigerator 24-48 hours before you want to grill it. This helps develop the crust because the juices and seasonings combine while refrigerated. Try it!
- Trust your thermometer. I have the hardest time with this one! As long as you know your thermometer is accurate, trust it!
- Take your steaks off the grill 5-10° BEFORE your target temp.
- Always let the steak rest for 5-10 minutes before serving.
- If you use the probe, leave it in the steak while it rests or the juices will leak out of the hole caused by the thermometer. You can also monitor the temperature of the meat while it's resting by pressing and holding down the manual feature on the XL grill.
- Always err on the side of undercooking. You can always cook longer, but you can't uncook something.
- Stay Calm and Have Fun. It's only steak. If you overcook it and don't like it, chop it up and turn it into something else. A steak & cheese twice-baked potato comes to mind!
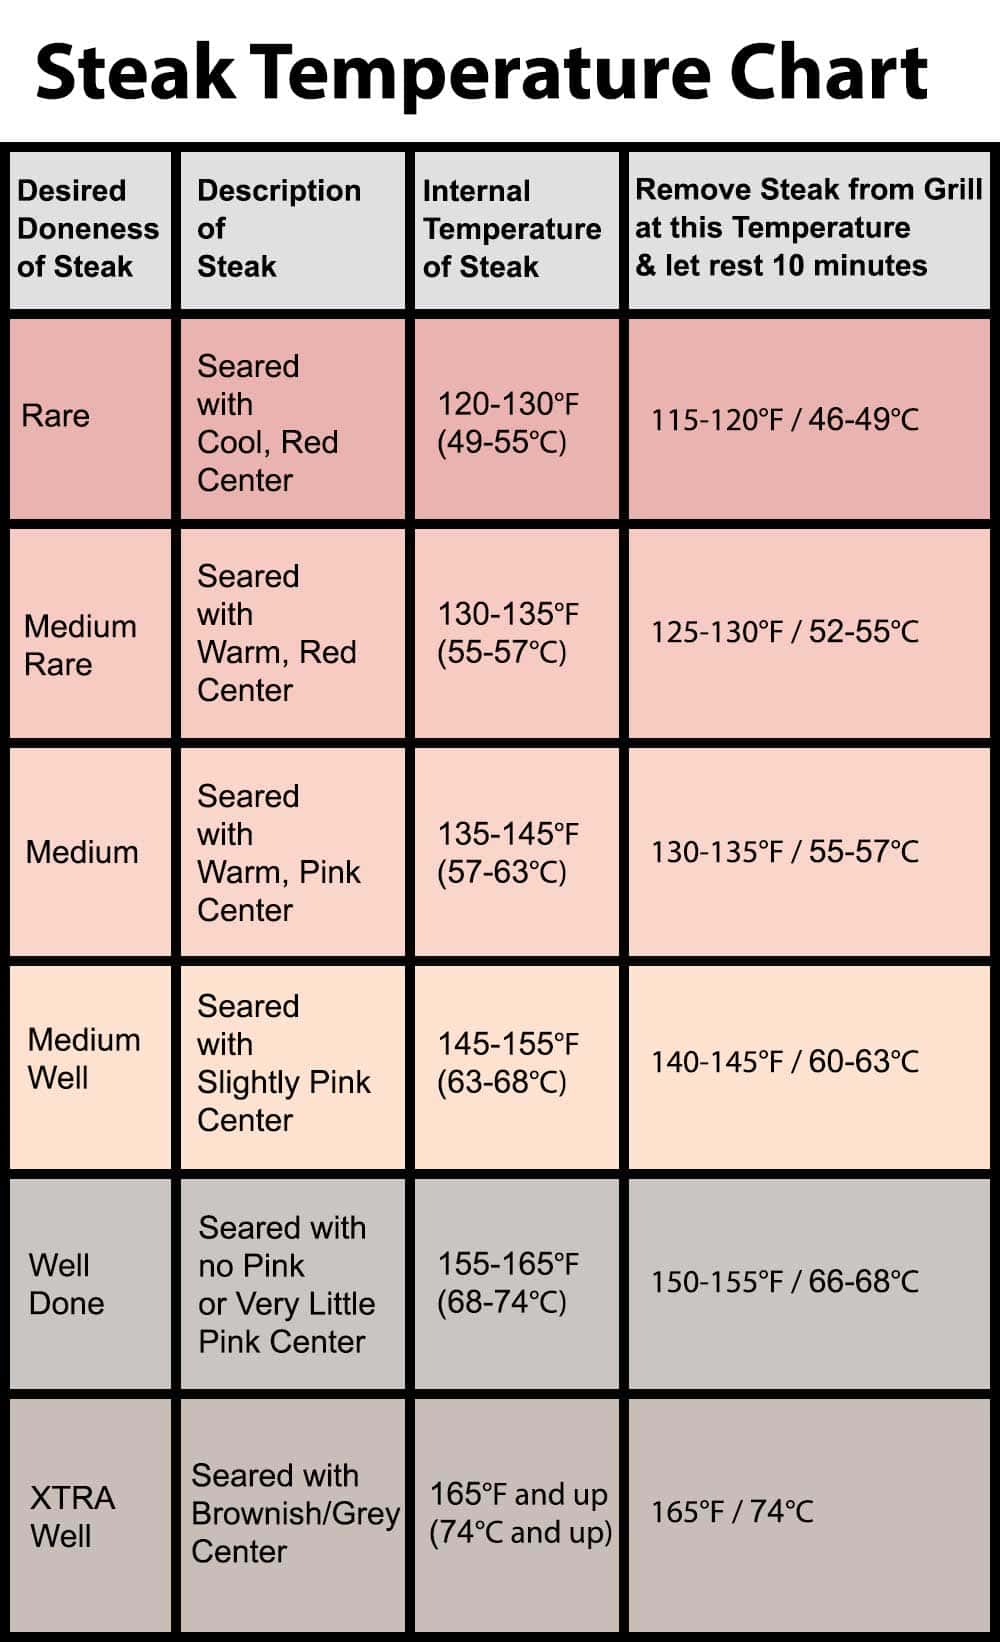
Steak Temperature Chart
Here is a chart that goes over the various temperatures that you want to aim for when cooking your steak to your desired level of doneness.
Cooking Times For Steak
Once you know how you want to cook your steak, you can use this table as a guide for timing. Remember all tables are ONLY guides. Use a thermometer for the most accurate cooking AND always air on undercooking versus over cooking. You can always cook longer, but you can't uncook!
Should I Use a Probe Thermometer to Monitor the Temperature of the Steak?
This is really a personal preference. Some of the Ninja Foodi Grills come with a probe thermometer built in and, while it's a nice feature, it only works if it's accurate.
My philosophy when it comes to technology is to trust and verify. I do this by using a secondary thermometer to double check the built-in probe on the Ninja Foodi Indoor Grill.
I think every home cook should have a good thermometer. Whether you want an instant read, a probe, or a combination of the two, it's worth the investment for sure.
I have heard great things about the Meater thermometer, but I don't have one so I can't really get into any details about it.
The two thermometers that I use are a Thermapen MK4 and the Pampered Chef Dual Thermometer.
The thermapen MK4 is pricey, but it's fast and very accurate.
The dual thermometer from Pampered Chef is half the price of the Thermapen MK4 and can be used as an instant read and a probe, so I love that feature. It has been very accurate when I compare it to the Thermapen, but I don't like the on/off button. It's hard to push. That's my only complaint.
I've tested the built-in probe thermometer in the Ninja Foodi XL Grill many times and it is definitely accurate; however, that doesn't mean that it is fool proof. The placement of the probe is as important as the accuracy of the thermometer.
This is true of any probe thermometer. Placement is key. You want the tip to be in the very center of the meat or in the middle of thickest part if the meat isn't uniform in thickness.
You do not have to insert the thermometer all the way into the meat, the temperature is only read from the very tip of the probe.
Placement will vary based on what you are cooking, but always aim to get the tip into the very center for the best results.
How Do I Grill Steaks to Different Levels of Doneness?
I'm lucky because both my husband and I like our steaks medium-rare, but that isn't the case in all households. Maybe you like yours medium-rare and your husband or wife likes theirs well done.
No worries! Simply stagger the cooking based on the time table above. You want to add the steak that is to be cooked less time after you start grilling the steak that will need more time.
They should both be removed at the same time to rest so you both enjoy perfectly cooked steak and can eat together! This isn't hard to figure out, here is how to do it.
Let's say, you like your steak cooked medium rare and your husband/wife/partner/child likes a well done steak. Simply look at the total time that it will take for the well done steak to cook and subtract the total time that the medium rare steak will take to cook.
For example: I'm cooking a 1" filet and I want it medium rare. Jeff wants his 1" filet cooked well done.
The 1" filet cooked to medium rare will take 8-9 minutes. The 1" filet cooked well done will take 15-16 minutes.
15-8=7 minutes. So, I will cook the well done filet for 7 minutes and then add on the 1" filet that will take 8-9 minutes. I go with the lower of the times because it's always better to undercook than overcook.
Both filets will get to their target temp in about the same time and can be removed to rest and served together.
This will also work to determine cooking times for steaks that vary in thickness.
How Do I Know When to Flip My Steak?
All meat will tell you when it is ready to be flipped. When you want to get the cross hatched grill marks, you will sear ¼ of the total cook time, turn the steak 45° and cook another ¼ of the total time. Then flip and either cook without turning for ½ the total time or you can turn 45° after ¼ of the time.
Here is an example.
My filet is 1½" thick and I want it cooked medium rare or to an internal temperature of 130℉/49℃. My total cook time will be 12 minutes on Max High grill.
Cook for 3 minutes, make a 45° turn and cook for 3 more minutes. Flip and repeat.
HOWEVER, and this is SUPER IMPORTANT... if the meat doesn't release easily, it's NOT READY to be moved!
That's what I mean when I say all meat will tell you when it's ready to be flipped. If you go to turn it or flip it and meet resistance, let it cook another minute or two. You can shave that time off at the end of cooking.
If you force it to release before it's ready, you will rip the sear right off the steak. You don't want that!
What Factors Affect How Steak Cooks?
All cuts of beef will cook about the same, so the cut of steak doesn't matter as much as the thickness of it. There are some things to note when cooking leaner steak versus a fattier cut and I will go over some of those here as well.
When using the Ninja Foodi Indoor Grill to cook various cuts of steak, you will want to adjust your Grill setting based on the amount of fat in the cut you are using.
Leaner steaks will do fine cooked on Max Grill, the hottest setting on the Ninja Foodi Indoor Grill. They can also be cooked on lower settings, but keep in mind you want the hottest surface possible for a great sear. I recommend preheating on Max grill when grilling steaks EVEN if you are going to cook them at a lower temperature.
Fattier cuts, like Ribeye, do better on lower settings. This is mainly to avoid the smoking that comes from the fat being cooked on high settings. I still suggest preheating on Max Grill and then lowering the temperature to High grill to grill the ribeye. I've grilled ribeyes on Max grill and they cook fine, but I did have a lot of smoking.
The biggest factor that determines your cooking time of steaks is thickness. All grilled steaks cook from the outside in, so the thicker the steak, the longer it's going to take to cook.
The temperature of the steak will also affect the cooking times. Colder steaks will take longer than ones that sat out for 30-60 minutes before grilling. Colder steaks also do not always get the great sear marks because the cold steak immediately reduces the temperature of the grill grate and sear marks are made due to high heat transfer.
Are Sear Marks Just For Looks?
No, they aren't. Will a steak be delicious if you don't get sear marks. Certainly. Do sear marks increase the flavor of a steak. Yes, they do.
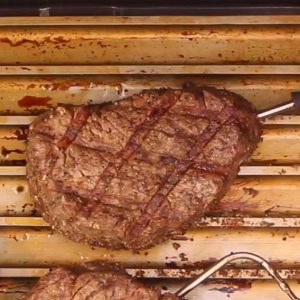
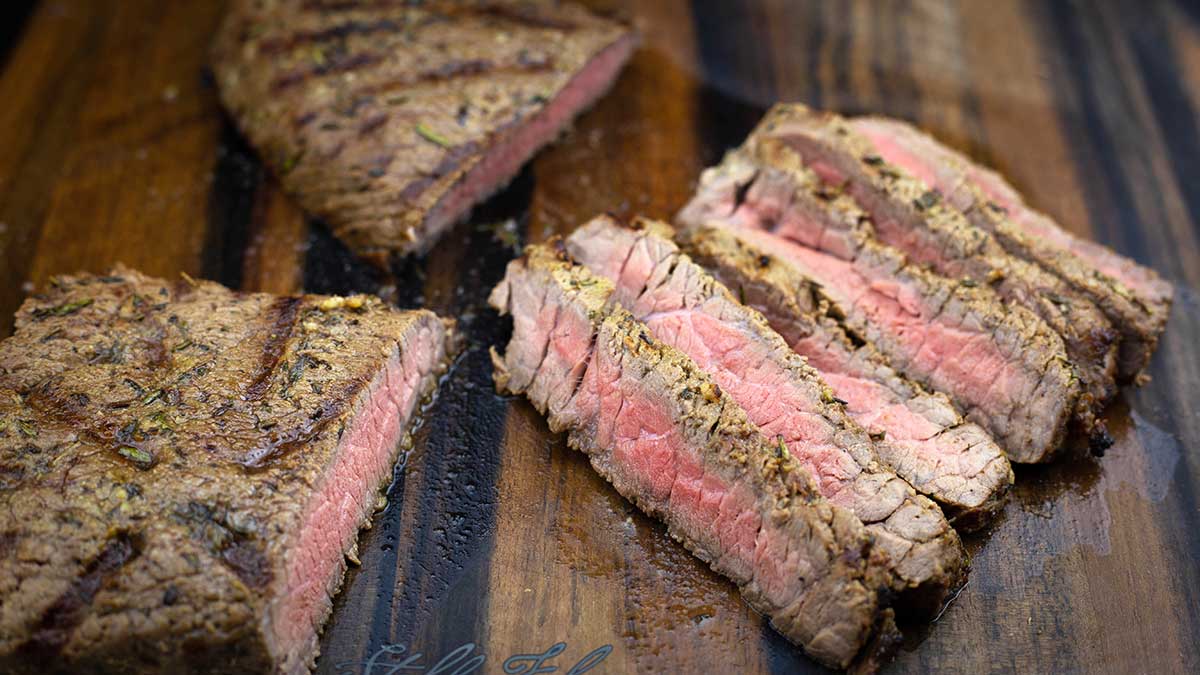
Sear marks are gorgeous on a steak. Especially when you get them perfect. Something I am not very good at, but managed to pull off on this steak.
More important than looks, is the science behind the grill marks. Where you see those dark lines, the maillard reaction has occurred.
The maillard reaction is a series of chemical reactions that occurs in cooking when the proteins and sugars on and in food begin to change as a result of heat being applied.
The maillard reaction is responsible for flavor in so many foods, not just the sear on a steak. It's the maillard reaction happening in browning onions that impart that flavor we all know and love in a really good French Onion Soup.
It's the maillard reaction that happens as sweetened condensed milk is cooked and turns brown and we call it Dulce de leche.
It's the maillard reaction that happens on top of a golden brown biscuit or a muffin top that is the best part of either one.
This is why many chefs do a full sear on their steaks instead of using a grill. They increase the surface area that benefits from the maillard reaction.
This is why grill marks are not just pretty to look at. This is why you want your grill grate to be as hot as possible when grilling steaks. The grate that comes with the Ninja Foodi Indoor Grill is very capable of making grill marks as long as you PREHEAT it first. Just know, they will be curved.
The look doesn't matter as far as flavor goes, but I have found that the Sear 'N Sizzle grill grate does produce a juicier and more flavorful steak. Why?
First of all, it's a great conductor of heat. Secondly, the juices that come out of the food as it cooks get trapped in the valleys of the grate and the heat steams them and throws that flavor back onto the food being cooked.
You can also turn the Sear 'N Sizzle over to it's flat side and do a full sear on the steak like many chefs do. That way, you get the maillard reaction over the entire surface of the steak.
I'm a big fan of the Sear 'N Sizzle from Grill Grate, BUT the original grate that comes with the Ninja Foodi does a fine job!
Both grill grates, or any cooking surface you are using should be preheated prior to cooking for the best results.
Why You Should Let Your Steaks Rest Before Cutting
Have you ever taken your steak off the grill and immediately cut it open and see the juices pour out? That's why we should always let our steak rest before cutting.
The juices in the steak will reabsorb as it rests and keeps the meat juicy and moist. Cutting immediately will allow the juices to run out and can leave your steak on the dry side.
However, we also have to keep in mind that the steak continues to cook as it rests, so it's super important to remove the steak from the grill 5-10° BEFORE it hits your target temperature.
Can I Cook Steaks From Frozen?
You can, but I really don't recommend it. I know we are busy and I'm always forgetting to take out something for dinner, BUT cooking steaks from frozen will never deliver the flavor and texture of cooking a thawed steak.
There are a few reasons for this. The biggest reason is, once again, heat transfer. A frozen steak is going to cool down the grilling surface so fast that it isn't going transfer the heat needed for a good sear.
Instead, it's going to produce steam. Steam is wonderful for cooking many things, but steak isn't one of them, in my opinion. The meat turns a dull grey color and just doesn't develop the flavor that is expect from a grilled steak.
The other disadvantage is seasoning. Seasoning helps create a nice crust on the steak, but is almost impossible to do when frozen. The moisture in the surface of the frozen meat prevents the seasonings from adhering.
The good news is, steaks thaw pretty quickly. If you find yourself ready to make dinner and you forgot to get the steaks out, simply thaw them in cold water.
Make sure they are sealed in a bag so that no water can get to the steaks, and submerge them for 30-40 minutes in cold water. The amount of time they need to thaw will depend on thickness and you can cook partially frozen steaks.
If the surface of your steak is thawed, but the middle is still frozen, I suggest preheating the grill on Max grill. Seasoning the steak. Sear the steak for 2-3 minutes per side (depends on thickness and how you like them cooked of course) and then reduce the heat to medium to finish cooking the middle.
I really hope this helps you grill the PERFECT steak in the Ninja Foodi Indoor Grill EVERY. SINGLE. TIME.
Feel free to join our Ninja Foodi Indoor Grill Facebook group if you have questions or just want to see what everyone is grilling up!
ABOUT THE RECIPE AUTHOR, LOUISE LONG
Louise is a full-time recipe creator and food blogger @ The Salted Pepper. She has over 30 years of experience with cooking and recipe development. She owned a restaurant for several years and was a full-time RN until retiring to blog full-time.

Louise has several very active Facebook groups that help people with the basics of cooking and getting the most out of the Ninja Foodi.
Ninja Foodi 101
Ninja Foodi Fresh & Healthy Meals
Simply Cooking with Louise
Seeing the need for easy, delicious, and high quality recipes, she is focusing all of her efforts creating recipes specifically for the Ninja Foodi. Her recipes are easy for the home cook to follow and provide step-by-step instructions.
Louise is also a YouTube creator and you can find most of her recipes in video format on The Salted Pepper YouTube channel.
She is very responsive to messages and eager to help in any way she can.
I WOULD LOVE TO SEE WHAT YOU ARE COOKING UP IN YOUR NINJA FOODI! TAG ME @THESALTEDPEPPER ON YOUR FAVORITE SOCIAL MEDIA PLATFORM WHEN YOU MAKE A DISH!
BE SURE TO FOLLOW THE SALTED PEPPER RIGHT HERE ⇓⇓⇓⇓⇓
Source: https://thesaltedpepper.com/steak-ninja-foodi-indoor-grill/